About Me

Showing posts with label Kitchen. Show all posts

Wednesday, January 18, 2012

Homemade Bagel Chips


When you make the Original Chex Mix, do you buy bagel chips to put in? Or, are you like me and refuse to pay $5.00 for a 7oz bag?  Sadly, bagel chips have always been one of my favorite ingredients in the mix!  So, this fall, when I started making Chex Mix recipes, I thought to myself, "I make croutons at home.  Why not Bagel Chips?"   Well, guess what.  I tried it.  It's super easy and cheap to boot.  Score!
  • First, you slice your bagels.  For future reference, I'm using 3 bagels in this batch.
Depending on what I want the chips for, I slice them differently.  For any snack mix, I prefer the coins.

For soup or salad, I go with the faster method of plank slices.  Why?  Because, I'm lazy like that.  

  • Second, combine 2 Tablespoons melted butter or olive oil with your choice of seasonings mixed in.  I'm a garlic lover, so I added 3 large garlic cloves, minced.   You could do onion and garlic, parmesan and garlic, herb and garlic (Told you, I love garlic.)  Then placing all your bagel pieces in a large plastic bag, pour in the melted butter/olive oil and shake.  This will help with equal distribution.


  • Third, Empty contents of your bag onto a cookie sheet, spreading them out evenly.  Pop into a hot oven at 325 for 15-20 minutes until they are turning brown.  (YMMV, so watch carefully!)


  • Fourth,  Enjoy!  Once they are cooled you can put them in a container for storage for the week, or use them immediately in your soup.  


Monday, December 5, 2011

Creamy Tomato Pancetta pasta with Feta

Sometimes, when you try to make dinner with whatever you find in the fridge and pantry, you find a masterpiece.
This time I'll contribute it to the wonderful ingredients.   After all, with cream and pancetta, how can you really go wrong?   Add in simple prep, and 20 minutes of cook time, and it's a keeper for us.


Pancetta and Feta Pasta

Ingredients:
½ lb Pancetta, diced
1 onion, diced
2 cloves garlic, minced
14 oz diced tomatoes
1 can tomato sauce
¼ cup cream
Fresh Basil
Feta

Directions

  1. Fry the pancetta in a saucepan until crispy, about 5 minutes
  2. Drain some of the fat according to diet/taste
  3. Add the onions, fry until caramelised
  4. Add the garlic and diced tomatoes, gently fry around 5 minutes
  5. Add the tomato sauce and leave on low heat for 15 minute
  6. Turn off heat, stir in ¼ cup cream. Add more if you're feeling indulgent!
    Top with Fresh Basil and Feta to serve over Pasta. Enjoy!

Monday, September 26, 2011

Such a Yummy Day

Mixed in with a huge day of homeschooling, many loads of laundry, and all the other normal every day things today I canned.  Again.

This morning I did a load of Black Beans.  I did the same thing as with the Kidney Beans the other day.  I soaked them overnight, rinsed them a few times, and then filled the jars about 3/4s full with beans (for pints that is about 1 1/2 cups).  I topped the jars off with water and a tsp of salt for flavor.  They then processed in the pressure cooker for 75 minutes.
     Beans - $3.00
     Lids - $1.16
     Each Pint = $0.57 cents
     The bottles contain a bit more than a traditional can of beans you'd buy from the store.

This afternoon, once I got the chickens roasting in the oven (important for later!), I started working on the 20 lbs of grapes I bought for $0.99/lb.  I used my Victorio Food Strainer again with the shorter spiral.  I couldn't find any information on which grate to use though.  I started out using the apple/tomato grate, and then later moved to using the pumpkin grate as I wanted the pulp for jam.  I only had enough sugar and pectin on hand to make 2 batches of Grape Jam.  Thankfully though, we did all the mashing/juicing today and there is another 10 cups of grape juice sitting in the fridge to make two more batches of jam tomorrow. The grapes were BY FAR the messiest thing I have canned this year!
      Grapes - $20.00
      Sugar - $4.00
      Lids - $2.33
      Each Pint - $1.88
      This stuff is Delicious!  Even with the ability to buy cheaper, I'm glad I did the work to make this.

Once we ate dinner, my dear darling pulled all the remaining chicken off the carcasses for me.  We tossed the bones into the stock pot with carrots, celery, onions and bay leafs, covered in water and let it simmer away while I tried to clean up everything else for a few hours.  I was able to get 7 pint jars of delicious Chicken Stock from the 2 roasted chickens!   I have always frozen chicken stock before, but now that I have a pressure canner of course I had to can it!   It has a very short processing time of only 25 minutes, so I figured.... Why Not!?
     Chicken Bones - Free
     Onion, Celery, Carrots, Bay Leaf - Negligible
     Lids - $1.16
     Each Pint - $0.17 cents a bottle!
     Definitely worth you time!

I was also taken out to a delicious lunch at Saffron Grill in North-gate.  It is one of my favorite Indian Restaurants.  We won't break that down.... I'd have a harder time justifying it!

Such a delicious, yummy, disastrously messy day!

Wednesday, September 21, 2011

A Little Sweetness

I am the proud new owner of a Victorio Food Strainer/ Sauce Maker.   Let me tell you.  It Rocks.
Weeks ago I spent many an hour cruising the net trying to figure out what tool would be the best choice for working with blackberries.  I have frozen my entire harvest the past two years, but this year I really wanted to make some Jams and Syrups.  I made my first batch of Blackberry Jam over a month ago, and while it all got devoured in the first two weeks, the seed content was undesirable.  Honestly, it was just plain annoying.  The seeds made the jam very chewy and got stuck in your gums all the time!
Unfortunately, I waited too long in the season to make the decision to buy the Victorio, and I only had one bucket of blackberries left.  I took my bucket of blackberries, washed them a bit, then dumped them in a large stock pot with about half a cup of water.  I boiled them for a few minutes, till the point where they started to soften, then poured them into the strainer's hopper.  It took only a few minutes to process the seeds from juice and pulp!   (I tried to reprocess the seeds/skins but would not recommend this for blackberries.  There was not enough fruit left to separate and I ended up jamming the tool with solid seeds.)  I then poured the juice and fruit pulp back into the stock pot to boil with some sugar and some lemon zest till it started to thicken and then poured it into small jars.  Thankfully we had a little too much for 8 jars, and I had to use some up, right away.  This syrup is amazing on ice-cream and looks beautiful to boot!  I can't wait to try it on waffles!  I am sad I don't have any more blackberries to work with as I'd love to make a batch of syrup with a bit of Almond flavoring added...  Just the thought makes my mouth water.

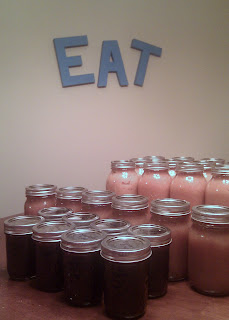
Along with the syrup, I was able to can a few apple sauce variations.  I cut apples in half and roasted multiple huge pans in the oven, then used the Victorio to mash all of the ingredients together.  While this took a very long time to make so much applesauce, it was really light work.  Both Khali and Porter loved to crank the handle and smoosh the fruit down the hopper.  I was able to reprocess the discarded skins and seeds a second time on the apples to reclaim more sauce.  I was amazed how dry the seeds and skins where when we were done.  I felt there was very little fruit wasted.

  • I combined some with Pears and a little bit of vanilla and nutmeg for an Apple-Pear sauce.
  • I mixed some with Poached Peaches and Ginger for Apple-Peach sauce.
  • I also left a few jars straight Roasted Apple sauce, which is delicious on its own.

At this point, I ran out of large quart bottles, and only had pint, and jelly jars left on hand.  With no desire to run to the store to pick up another case, I was inspired to cook down the rest of the apples further to make a delicious Apple Butter.  I followed the recipe found here http://simplyrecipes.com/recipes/apple_butter/.  I snuck a bit before canning it and think its a definite keeper.
Amazingly, after canning for four days straight, the only wound I received was a burn from that darn apple butter.  Watch out when you're cooking it down, you're working with such a thick sauce the air bubbles pop pretty high!  
There is a beauty involved with canning.  I am enjoying looking at all of the bottles filled with beautiful food.  Part of me just wants to keep canning and putting food away.  It is the same part of me that sheds a tear whenever I drive past a blackberry bush that is now succumbing to fall.   But at the same time, I am very excited to be putting away the canning supplies tomorrow and reclaiming the kitchen and dining rooms.  Now if only I could figure out where to put all this food!


Monday, September 19, 2011

September is for Preserving

I have been very busy this month working on putting away produce for the rest of the year.  Blackberry season seemed to be a bit late this year, not really coming on until the second week of September, but the kids and I have managed to put away about 4 gallons of berries, and make one batch of blackberry jam (not to mention several batches of muffins, pie bars, and any other baked good that sounded delicious at the time).  I think the season is just about over, but I am trying to get another gallon or two to make into Syrup.  We will have to see if the bushes have enough left to support this en devour.

Saturday a friend called me and asked if I was interested in some boxes of tomatoes as she was at a fruit stand in Bellevue picking some up already.  She kindly brought me home 4 boxes of tomatoes.  When trying to figure out how much of any food you will need, it's a bit of an iffy proposition with multiple variables.   I have never tracked how much of anything we've used before in a winter, so this was my best guess.  I knew that we needed to make a batch of Chili Sauce, and that we were out of all canned tomatoes.  Turns out that 80 lbs of tomatoes turns into 46 quarts of tomatoes, and 9 pints of Chili Sauce. (In case you are wondering, Chili Sauce is what we serve on our roasts every Sunday and is a staple in our home.  I believe the original recipe, that my family still uses today, came from my husbands great-grandmother.)
I feel lucky that only 2 of the quarts did not seal.  They are sitting in the fridge for use this week.  Now I just need to figure out where I am going to store all of these!

It has been a busy weekend.  I never want to see another produce box of tomatoes, unless it looks like this. Zander was a pretty good little guy while I slaved over the steaming stove for hours at a time.  He thought playing in this box was a great thing, especially when I added Goldfish crackers into the equation.   
He is pretty Select, don't ya think?

Khali helped me in the kitchen canning the first two batches of tomatoes on Saturday and was an invaluable addition.  She is growing up so quickly!  Today she helped take care of the little two by making them a box train and pulling them around, and around, and around the house.   She had a good time in the creation of her idea, and the little kids had a good time snacking and riding around.  


I am all done with Tomatoes for this season.  Now I just have to deal with the boxes of apples.... but that is for another day.  I ordered a Victorio Food Strainer to help me with this project that will be here soon!  I'm actually a little excited about this next canning activity!  

Wednesday, April 7, 2010

Getting Sidetracked in the Kitchen

Two nights ago, I used my Bosch to whip my whipping cream while I chopped strawberries to make Strawberry Shortcakes. Apparently, that process takes much less time that I had anticipated, because when I went to check on the cream, it was chunky! Thankfully I had more whipping cream in the fridge and the second time around I watched the Bosch more carefully and we did manage to have dessert. I put the ruined whipping cream in the fridge thinking that it would be good on top of waffles or french toast for breakfast.

Unfortunately, the combination of the kids being sick and my pregnancy has left me without energy in the morning so we have eaten cereal and oatmeal. This afternoon I was planning to make some Banana Bread with the brown banana's I bought yesterday for 10 cents a pound and the recipe I love uses buttermilk. I didn't have any in the fridge, but when making butter from cream, you also get buttermilk as a side product! At last I had figured out how to use up my mistake!

I put the whipping cream back into the Bosch and let it whip for another few minutes until there was a clear separation of the solids from the liquids. People have said you can hear a change in your motor at this point... I just waited till a lot of the solids where sticking to the wire whisks.


At that point I poured as much of the liquid off into a separate bowl as I could. Then gathered up the solids in my hand and squeezed them over the bowl, after all you don't want to waste your buttermilk! You could also use a fine colander for this step if you are incline to dirty another dish. Your buttermilk is now ready for use.


Now you will need to rinse and work your butter in cold water a few (3-5) times, until the water runs clear. I highly recommend using ice water for this step or your butter will get too soft to work with successfully.
At first I started doing this with a large wooden paddle, to work the water into the butter, but after trying that, I figured my hands worked much more efficiently.


To make my butter presentable I put saran wrap inside of a muffin tin before stuffing the butter into it. I then put it in the fridge to harden it for a few minutes before unwrapping and plating :) Ready to eat with the hot fresh Banana Bread. Now, wasn't that fun?

LinkWithin

Related Posts with Thumbnails