About Me

Showing posts with label Recipes. Show all posts

Tuesday, July 17, 2012

Sweet Dumplings for Fruit Cobbler

I or members of my family have been sick for the past 3+ weeks.  I'm worn out honestly.  The weather is nice, I have lots of activities I'd like to attend, just not really the energy to do it yet.  I've been on the mend for over a week now.  I'm hoping everyone else is on the upswing too.

We had dinner guests tonight and I made a Peach Blueberry Cobbler for dessert.   Summer desserts are some of my favorite.   I Love chocolate.  Especially good chocolate where you only want a bite or three.  Cakes and Pies are delicious as well.  However, there is something unmatched about baking with delicious fruit, fresh in season!  These are the desserts I contemplate making two of, and hiding on in the corner cupboard just for me.  The types of desserts that if there is a bit left in the pan after dishing everyone up,  I WILL devour it without thought of sharing!

This is my go to dumpling recipe no matter what fruit i'm cooking with.  I feel it goes with most everything, and can still yield a good result when I do it quick and dirty (meaning, I'm not measuring much).  I have used so many liquids, and they've all worked well with slight flavor variations.  I prefer the buttermilk so far.  Though I am tempted to make this with coconut cream the next time I have some on hand,  I'm willing to bet, it would be delicious too!

Sweet Dumplings

Instructions:

  • 1 cup flour
  • 2 T sugar
  • 1 1/2 tsp baking powder
  • 1/8 tsp salt
  • 1 tsp grated lemon peel
  • 1/4 cup butter
  • 1/4 cup cream, half and half, buttermilk, evaporated milk, or even, plain ole milk
Directions:
  1. Combine Flour, Sugar, Powder, Salt and the lemon peel in your mixing bowl.  
  2. Using a pastry blender cut in your butter till you have a mixture that resembles corn meal.
  3. Pour in your choice of liquid.  Combine only until all dough is moistened and evenly mixed.
  4. Drop spoonfuls over your prepared filling.  Sprinkle with nutmeg if you wish.  I usually do!
  5. Bake at 400 Degrees for 25-30 minutes, or until the top is golden brown.
I am tempted to make this with coconut cream the next time I have some on hand,  I'm willing to bet, it would be delicious too!


Sunday, May 27, 2012

Adventures in an alternative Sour Dough


A friend of mine gave me a sourdough start in April.  Actually, she gave me five.  I put them in the fridge to keep for a few days till I could get to them but since then, we've been cooking!
I know that Amish Friendship Bread comes with a little handout and  recipe with specific instructions on it's feeding schedule, how and when to split the mixture and yet more details on how to spread it around to the whole world, 5 friends at a time.  Grand Ambitions... and on their preferred schedule, I believe it could be achieved.  However, I also think that majority of people are really missing what a gem this ziplock bag of goo on the counter really is.  Sure.  The cinnamon laden Amish friendship cake is amazing.  But, it has so much more potential!
I love their slightly sourdough pancakes and waffles.  Both are delicious!  I would not give up my traditional waffle recipe, but I would love to keep this as an alternative.  My favorite resource for recipes, most of them being reviewed, can be found here.

The morning is going to be crazy at the least, as I finished bedtime with all the children at 10:45.  That is up to 3 hours late for some of them!    Knowing this, I'm hedging my bet tonight by preparing breakfast for the morn.
I found a Apple Cranberry Nut Bread recipe that is made with the starter.

I had to make some subs from lack of ingredients, and others I choose to add out of preference.
I wanted to make them with all wheat flour to give them a bit more staying power and help propel every one through their meetings in the morning.  I added the coconut at the end on a whim.  I wouldn't change that, as it added a delicious added note!

Apple Cranberry Nut Amish Friendship Muffins

Ingredients:

  • 2 cup Amish Friendship Bread Starter
  • 1 cup yogurt
  • 1 vegetable oil
  • 6 beaten eggs
  • 1 tsp salt
  • 2 tsp vanilla
  • 1 1/4 cup sugar
  • 4 cups wheat flour
  • 2 1/2 tsp baking powder
  • 1 tsp baking soda
  • 1 cup craisins
  • 1 cup shredded apple
  • 1 shredded carrot
  • 1/2 cup shredded coconut
  • 1 cup smashed pecans

Directions:
  1. Preheat oven to 325 F
  2. Beat eggs, then combine all ingredients in Bosch.
  3. Bake in large muffin tins for approximately 25 min*.
These are a delicious muffin.  Not too sweet, but still yummy enough to devour.  A great Breakfast!
*My oven is a bit wonky, please don't go off of this time measurement by faith alone!


On a side note, while you're waiting for those muffins to bake,  macerate some strawberries with fresh mint leaves.

Thinking these are destined to be served over some ice cream tomorrow topped with some whipped cream!  Yum!

Wednesday, January 18, 2012

Homemade Bagel Chips


When you make the Original Chex Mix, do you buy bagel chips to put in? Or, are you like me and refuse to pay $5.00 for a 7oz bag?  Sadly, bagel chips have always been one of my favorite ingredients in the mix!  So, this fall, when I started making Chex Mix recipes, I thought to myself, "I make croutons at home.  Why not Bagel Chips?"   Well, guess what.  I tried it.  It's super easy and cheap to boot.  Score!
  • First, you slice your bagels.  For future reference, I'm using 3 bagels in this batch.
Depending on what I want the chips for, I slice them differently.  For any snack mix, I prefer the coins.

For soup or salad, I go with the faster method of plank slices.  Why?  Because, I'm lazy like that.  

  • Second, combine 2 Tablespoons melted butter or olive oil with your choice of seasonings mixed in.  I'm a garlic lover, so I added 3 large garlic cloves, minced.   You could do onion and garlic, parmesan and garlic, herb and garlic (Told you, I love garlic.)  Then placing all your bagel pieces in a large plastic bag, pour in the melted butter/olive oil and shake.  This will help with equal distribution.


  • Third, Empty contents of your bag onto a cookie sheet, spreading them out evenly.  Pop into a hot oven at 325 for 15-20 minutes until they are turning brown.  (YMMV, so watch carefully!)


  • Fourth,  Enjoy!  Once they are cooled you can put them in a container for storage for the week, or use them immediately in your soup.  


Monday, September 26, 2011

Such a Yummy Day

Mixed in with a huge day of homeschooling, many loads of laundry, and all the other normal every day things today I canned.  Again.

This morning I did a load of Black Beans.  I did the same thing as with the Kidney Beans the other day.  I soaked them overnight, rinsed them a few times, and then filled the jars about 3/4s full with beans (for pints that is about 1 1/2 cups).  I topped the jars off with water and a tsp of salt for flavor.  They then processed in the pressure cooker for 75 minutes.
     Beans - $3.00
     Lids - $1.16
     Each Pint = $0.57 cents
     The bottles contain a bit more than a traditional can of beans you'd buy from the store.

This afternoon, once I got the chickens roasting in the oven (important for later!), I started working on the 20 lbs of grapes I bought for $0.99/lb.  I used my Victorio Food Strainer again with the shorter spiral.  I couldn't find any information on which grate to use though.  I started out using the apple/tomato grate, and then later moved to using the pumpkin grate as I wanted the pulp for jam.  I only had enough sugar and pectin on hand to make 2 batches of Grape Jam.  Thankfully though, we did all the mashing/juicing today and there is another 10 cups of grape juice sitting in the fridge to make two more batches of jam tomorrow. The grapes were BY FAR the messiest thing I have canned this year!
      Grapes - $20.00
      Sugar - $4.00
      Lids - $2.33
      Each Pint - $1.88
      This stuff is Delicious!  Even with the ability to buy cheaper, I'm glad I did the work to make this.

Once we ate dinner, my dear darling pulled all the remaining chicken off the carcasses for me.  We tossed the bones into the stock pot with carrots, celery, onions and bay leafs, covered in water and let it simmer away while I tried to clean up everything else for a few hours.  I was able to get 7 pint jars of delicious Chicken Stock from the 2 roasted chickens!   I have always frozen chicken stock before, but now that I have a pressure canner of course I had to can it!   It has a very short processing time of only 25 minutes, so I figured.... Why Not!?
     Chicken Bones - Free
     Onion, Celery, Carrots, Bay Leaf - Negligible
     Lids - $1.16
     Each Pint - $0.17 cents a bottle!
     Definitely worth you time!

I was also taken out to a delicious lunch at Saffron Grill in North-gate.  It is one of my favorite Indian Restaurants.  We won't break that down.... I'd have a harder time justifying it!

Such a delicious, yummy, disastrously messy day!

Wednesday, September 21, 2011

A Little Sweetness

I am the proud new owner of a Victorio Food Strainer/ Sauce Maker.   Let me tell you.  It Rocks.
Weeks ago I spent many an hour cruising the net trying to figure out what tool would be the best choice for working with blackberries.  I have frozen my entire harvest the past two years, but this year I really wanted to make some Jams and Syrups.  I made my first batch of Blackberry Jam over a month ago, and while it all got devoured in the first two weeks, the seed content was undesirable.  Honestly, it was just plain annoying.  The seeds made the jam very chewy and got stuck in your gums all the time!
Unfortunately, I waited too long in the season to make the decision to buy the Victorio, and I only had one bucket of blackberries left.  I took my bucket of blackberries, washed them a bit, then dumped them in a large stock pot with about half a cup of water.  I boiled them for a few minutes, till the point where they started to soften, then poured them into the strainer's hopper.  It took only a few minutes to process the seeds from juice and pulp!   (I tried to reprocess the seeds/skins but would not recommend this for blackberries.  There was not enough fruit left to separate and I ended up jamming the tool with solid seeds.)  I then poured the juice and fruit pulp back into the stock pot to boil with some sugar and some lemon zest till it started to thicken and then poured it into small jars.  Thankfully we had a little too much for 8 jars, and I had to use some up, right away.  This syrup is amazing on ice-cream and looks beautiful to boot!  I can't wait to try it on waffles!  I am sad I don't have any more blackberries to work with as I'd love to make a batch of syrup with a bit of Almond flavoring added...  Just the thought makes my mouth water.

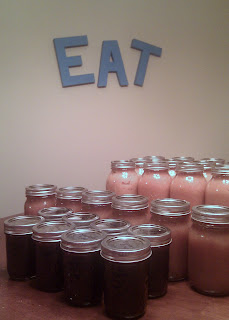
Along with the syrup, I was able to can a few apple sauce variations.  I cut apples in half and roasted multiple huge pans in the oven, then used the Victorio to mash all of the ingredients together.  While this took a very long time to make so much applesauce, it was really light work.  Both Khali and Porter loved to crank the handle and smoosh the fruit down the hopper.  I was able to reprocess the discarded skins and seeds a second time on the apples to reclaim more sauce.  I was amazed how dry the seeds and skins where when we were done.  I felt there was very little fruit wasted.

  • I combined some with Pears and a little bit of vanilla and nutmeg for an Apple-Pear sauce.
  • I mixed some with Poached Peaches and Ginger for Apple-Peach sauce.
  • I also left a few jars straight Roasted Apple sauce, which is delicious on its own.

At this point, I ran out of large quart bottles, and only had pint, and jelly jars left on hand.  With no desire to run to the store to pick up another case, I was inspired to cook down the rest of the apples further to make a delicious Apple Butter.  I followed the recipe found here http://simplyrecipes.com/recipes/apple_butter/.  I snuck a bit before canning it and think its a definite keeper.
Amazingly, after canning for four days straight, the only wound I received was a burn from that darn apple butter.  Watch out when you're cooking it down, you're working with such a thick sauce the air bubbles pop pretty high!  
There is a beauty involved with canning.  I am enjoying looking at all of the bottles filled with beautiful food.  Part of me just wants to keep canning and putting food away.  It is the same part of me that sheds a tear whenever I drive past a blackberry bush that is now succumbing to fall.   But at the same time, I am very excited to be putting away the canning supplies tomorrow and reclaiming the kitchen and dining rooms.  Now if only I could figure out where to put all this food!


Friday, August 27, 2010

Foodies - Great Resources!

I go through phases in my kitchen leaning on one method of preparation more than the rest for periods of time, depending on what life has on my plate.  I am aware that going into the rainy season soon on top of being returned to baby momma status, that I will be soon turning to my Crockpot to avoid the evening dinner woes that are inevitably on the horizon.  
Today I came across another local North West transplant.  Whom like me, is enjoying a summer of moderate temperatures, unlike the ones we left back home further South.  If you're looking for some recipes to add to your  menus, check Jessie out over on her blog Bites.  I have a few recipes bookmarked to start with including the Slow Cooker Chocolate Mess.  With a name like that, and a picture of it served with Ice Cream.... I just can't wait!  She also has beautiful red dish ware that serves as the backdrop to most of her food pictures that I'm in love with.  
Tonight for dinner, I made her Crockpot Chicken with Black Beans  for dinner knowing that I would be coming home from shoe shopping with the kids and we would all be hungry.  With only 5 ingredients, I had the time to put it together in the Crockpot while telling the kids to get their shoes on and get themselves  into the car.  The recipe also works using frozen chicken, which I tend to always have in the freezer and keeping preparation simple.   We served this over rice, but I would like to try it wrapped up in a tortilla next time.  The kids all asked for seconds, so despite its lack in appearance, this recipe is a keeper for us!

Crockpot Chicken with Black Beans

1 lb frozen boneless chicken 
1 (15 1/2 ounce) can black beans -drained
1 (15 ounce) can corn - drained
1 (15 ounce) jar salsa, any kind
1 (8 ounce) package cream cheese

Directions
Combine frozen chicken, black beans, corn and salsa into Crockpot.  
Keep in crock pot on low for about 5 hours or until chicken is cooked and easy to shred.
Add 1 package of cream cheese (just throw it on top!) and let sit for about 1/2 hour.
Break your chicken into pieces, or shred and serve over a bed of rice.

Saturday, August 21, 2010

Lovely Birthday Flowers and Cake

I am one lucky girl.  For my birthday my husband got me a Silhouette Craft cutter, sent this beautiful bouquet of flowers to me during the day, and then took me out to Sushi for dinner.
After dinner we came home to eat my Chocolate Cake with Caramel Frosting that I had made earlier in the day using my brand new Cookie Paddles that my wonderful Mother-in-Law sent me.  I have heard many wonderful things about the uses of these paddles, and I am so very happy to have my very own!

Caramel Frosting

2/3 cup Butter
1 cup Packed Brown Sugar
1/3 Cup Milk  (though any cream will make this even better)
4+ Cups Powdered Sugar

Melt butter over medium-low heat.  Once melted stir in Brown Sugar until well combined and continue to cook for 2 minutes.  Add Milk and bring to boil.  This may happen very quickly so watch closely!   Turn off heat immediately and let this mixture cool.  Once cool, use a hand mixer or whisk to slowly add powdered sugar until you have a nice thick frosting consistency.   If you start to add the Powdered Sugar before your butter mixture is completely cool, be careful you do not add too much sugar.

**As you can see in my picture, I wasn't patient enough and added a bit too much powdered sugar making my frosting very hard to spread on my cake.   It tastes delicious either way, but if you're going for a beautiful even frosting, wait for the butter mixture to come to room temperature, and add the powdered sugar slowly.  I had a few little hands helping to pour in the sugar as fast as they could...

The next time I make this cake, which has been requested by the older two for their birthday, I may try to sprinkle a bit of high quality sea salt over the top.  It might not be kid friendly, but I'm betting it would taste Delicious!

Wednesday, July 28, 2010

Yummy Banana Bread


I have a lovely friend that shared some Banana Bread with me, and after devouring it at her home, I knew I had to have the recipe! Her grandmother had created this recipe and passed it down through her family, and now you can make it too! Be warned though, the first time I made this Banana Bread, the entire 9x13 pan was gone in a few hours, and then we made a second batch which lasted the rest of the day.

Banana Bread

1 1/2 cups Sugar, I prefer a mixture of white and brown.
2 Eggs
1/2 cup Oil

1 1/4 cup Mashed banana
1/4 cup Buttermilk or Soured Milk
1 tsp. Vanilla

2 1/2 cups Flour
1 tsp. Baking Soda
1/2 tsp. Baking powder
3/4 tsp. Salt

Set up your mixing bowl and cream together the first three ingredients. Then combine the next three ingredients into the bowl. Measure and mix the last 4 ingredients together before pouring those into the wet ingredients and lightly mix together. Don't let your mixer go for too long on this step!
Pour into a greased 9x13 cake pan and pop into a hot oven at 350 for about 30-40 minutes. The Banana bread should be a lovely golden brown on top and pulling away from the edges of your pan. Test the center with toothpicks before taking out of the oven as there is nothing worse than gooey banana bread!

Friday, July 9, 2010

Cold Dinner - Peanut Sesame Noodles


Everyone once in a while, the weather gets so hot that even in Seattle Washington, you do not want to turn on the stove or oven even for a minute. If it happens that you also do not want to eat sandwiches, and cannot convince your family that a salad can be considered a meal, then you need recipes like this.

Picture taken from www.foodmayhem.com

Peanut Sauce

  • 1/2 cup creamy peanut butter
  • 1/3 cup soy sauce
  • 2 tablespoons sugar
  • 4 teaspoons sesame oil
  • 1 tablespoon white vinegar
  • 3 to 4 cloves minced garlic
  • water to thin sauce and make stirable
Cooked, drained and cooled Spaghetti Noodles

Garnish
  • thinly sliced cucumber
  • crushed peanuts
  • shredded carrots
The sauce just needs to be well combined and can be done many days before hand. I often make a double batch and keep the extra in a pint jar in the fridge for another dinner or lunch. Combine everything right before eating and enjoy! This is a wonderful vegetarian cold meal for those hot days. Its also great picnic food if you want something a bit different than your usual fair.

Enjoy!


Thursday, July 8, 2010

Dry Mixes in the Kitchen


Today , despite the extremely warm temperature, the little two girls ate the rest of the oatmeal packets that I had bought on a killer sale this past winter. All of my girls love oatmeal whether its for breakfast or a snack, and the older kids are also able to make their own, which at this season in life, is a big plus for Mommy! I have made up an oatmeal mix before hand and kept it in a larger container to measure out individual bowls, but really wanted to keep the 'single serving' idea going to reduce both disaster and waste. The girls all really enjoy being able to choose different types as well. Many websites tout being able to use snack size bags for this, but I really dislike storing food in plastic bags. I may be the only person with this problem, but without a doubt, one or two bags of some substance gets pushed to the bag of the cupboard. Undoubtedly, I only find it way after its prime and it often will have bugs of some sort. That means all my efforts to be frugal and healthier are blown to bits because I end up throwing away the food from that cupboard! I have learned to keep all food in very tightly sealed containers, it just works out better for me. Luckily I have kept all the baby food jars Abi has eaten in the past year and they are a perfect size to store a single serving of a flavored oatmeal!
I let the girls help with the entire project, from the blender, to the measuring, to the snacking on the raisins the entire time, which created a huge disaster, but proved to be a lot of fun as well. (I would have taken pictures of them being all cute, but my camera was upstairs and I was too lazy to go and get it, sorry!)
Here is what we did:
  • 1/4 Cup quick oats
  • 2 Tablespoons ground quick oats (like a coarse flour)
  • 1 Tablespoon non-dairy creamer (think coffee)
  • 1 Teaspoon -1 Tablespoon sugar (sometimes brown, sometimes white)
  • 2 Tablespoons dried fruit bits of your choice (or however much more you can git into the jar)
We mixed up three kinds of oatmeal this time around, Blueberries and Cream (which contains dried blueberries and extra creamer), Raisin Spice (which contains raisins, 1 heaped tsp cinnamon and a healthy sprinkling of nutmeg) and Apples and Cinnamon (which contains dried apple and 1 heaped tsp of cinnamon). The sugar amount is really going to vary depending on what your families tolerance is currently set to. Since my kids have been eating the Quaker oatmeal packages, they like it very sweet. I am planning to make each batch with a bit less sugar until we taper down to 1tsp of sugar, unfortunately, right now, to make it palatable for them, we are closer to 3/4 Tablespoon.
The best parts of this kitchen endeavor are the ingredients are of much higher quality, each serving seems to be much more filling and they are much less expensive than the store bought counterpart!

Since the kitchen was already a dusty disaster, I figured we should just keep on rolling and put together some muffin mix in larger quart mason jars as well. I followed the "Universal Muffin Mix" the is found all over the net. I have made this mix before and rarely change a thing on it. I often cut in 2.5 cups of Crisco, reducing the amount of oils/fats that are necessary later. This makes the mix much more time consuming to make, but I prefer it to the regular recipe. Make sure you have a very large bowl if you are going to attempt this! This mix fills my large 'Thatsa Bowl" from Tupperware that is a 42 cup capacity. Once mixed, I measured 3 cups of the dry mix into my quart jars and labeled them for the pantry. With this size dry mix, I use 1 cup water/liquid, 2 eggs, 1 tsp vanilla, and 1/4 cup of oil/butters. This results in roughly 12 large muffins. This is very akin to the Better Crocker Muffin Mix's that are so simple to make, but offers so many more possibilities. One of our favorite variations that is not listed on RecipeZaar is Strawberry Banana Muffins. Mix in a big heaping spoon of strawberry jam with a few over rip bananas. And, if you're wondering; Yes, heaping spoon, sprinkle, pinch, handful... those are all very useful words in my cooking vocabulary. Cooking is about living a little!
Once the muffin mixes were done, I really wanted to forge ahead and make up a half dozen bread mixes as well, but alas, my ankles were barely differentiable from my calves, so my time in the kitchen was over. Hopefully another day in the near future will yield more dry mixes for my pantry.

Sunday, May 9, 2010

Buttermilk Syrup

I had a wonderful Mothers Day. My Loving Husband made me an omelet and a strawberry smoothie, complete with ice cream to start out the day! At church we had a wonderful talk about the value of mothering in sacrament and the primary children sang a few songs for all the mothers. To top it all off my Darling took the baby to his classes and I sat all by myself in Relief Society. Honestly, I didn't know what to do with myself! No one was pulling on my shirt, begging for snacks, or otherwise distracting me. It was fabulous.
After a little nap, I woke up hungry (of course) and began thinking of desserts. I wanted to make a cookie bar, so after sifting through a few recipes I settled on a Blondie. To make it extra special I topped it with Buttermilk Syrup. Sooo Yummy! Trust me, you'll want to try this. You'll also want to make this is your large pot even though the ingredients will initially measure into the bottom inch of the pan. We substitute this for maple syrup on our breakfasts from time to time. It has a wonderful butter flavor that is a welcome change from the maple every now and again.

Buttermilk Syrup

1 cup white sugar
3/4 cup buttermilk
1/2 cup butter
2 tablespoons corn syrup
1/3 teaspoon baking soda
2 teaspoons vanilla extract

In a saucepan, stir together the sugar, buttermilk, butter, corn syrup, and baking soda. Bring to a boil, and cook for 7 minutes over a medium heat. Stir occasionally. Remove from the heat, and stir in the vanilla.

Saturday, April 24, 2010

Lemon Poppy Seed Muffins

The absolute worst part about making muffins is cleaning the tins after-wards, right? These little gems are worth the effort though.
I understand they sell paper liners but I never seem to have any the morning I want to make muffins. To make quick work of clean up this is what I do. I take a paper towel and wad up a corner to be about the size of the inside of the mini muffin tin. I then pour a dab of oil onto the towel and wipe the inside of each tin. You may have to get more oil on your towel after half a dozen or so. What about a cooking spray? Well, like I said above. The worst part is cleaning the tins, and I really think the cooking sprays are harder to clean off than the food! When I was using the spray's I would have to use steel wool to clean the pans! If I used just dish soap, they would darken with a sticky goop on them the next time they were put in the oven. I'm sure there are studies done, but I don't want to think about what that does inside my body.
With the clouds looming outside the windows and the kids all happily distracted with Saturday Cartoons, I whipped up a batch of Lemon Poppy Seed Mini-Muffins to be devoured through the morning hours. The advantage of a large batch is they can snack on them and give you more time to do other things without children whining at 11:30 that they will starve if they do not eat lunch right away.

Lemon Poppy Seed Muffins
makes 96 mini muffins or 24 medium muffins
1 1/3 cup sugar
Grated zest 2 lemons
Juice of 2 lemon
4 cups all-purpose flour
4 teaspoons baking powder
1/2 teaspoon baking soda
1/2 teaspoon salt
1 1/2 cup combination of sour cream and plain yogurt
4 large eggs
3 teaspoon pure vanilla extract
1 splash of almond extract
1 stick (8 tablespoons) unsalted butter, melted and cooled
1/2 cup oil
4 tablespoons poppy seeds

For the Icing:

1 cup confectioners' sugar, sifted
2-3 tablespoons fresh lemon juice

Directions:

Center a rack in the oven and preheat the oven to 400 degrees F.
In a large bowl, rub the sugar and lemon zest together with your fingertips until the sugar is moist and the fragrance of lemon strong. Inhale deeply and think of wonderful spring weather then whisk in the flour, baking powder, baking soda, salt and poppy seeds.
In a large glass measuring cup or another bowl, whisk the sour cream, yogurt, eggs, vanilla and almond extracts, lemon juice, melted butter and oil together until well blended. Pour the liquid ingredients over the dry ingredients and, with a rubber spatula, gently but quickly stir to blend.
Muffin batter should be treated much the same as pancakes. Do not over work, a few lumps are actually preferred.

Divide the batter evenly among the muffin cups. Bake mini muffins for 15 minutes and medium muffins for 18 minutes, or until the tops are golden and a thin knife inserted into the center of the muffins comes out clean. Transfer the pan to a rack and cool for 5 minutes before carefully removing each muffin from its mold. Cool the muffins completely on the rack before icing them.

To make the icing:

Put the confectioners' sugar in a small bowl and add about 1 1/2 tablespoons of the lemon juice. Stir with a spoon to moisten the sugar, then add enough lemon juice, a dribble at a time, to get an icing that is thin enough to drizzle from the tip of the spoon. Then drizzle lines of icing over the tops of the muffins.

Enjoy!

Wednesday, April 7, 2010

Getting Sidetracked in the Kitchen

Two nights ago, I used my Bosch to whip my whipping cream while I chopped strawberries to make Strawberry Shortcakes. Apparently, that process takes much less time that I had anticipated, because when I went to check on the cream, it was chunky! Thankfully I had more whipping cream in the fridge and the second time around I watched the Bosch more carefully and we did manage to have dessert. I put the ruined whipping cream in the fridge thinking that it would be good on top of waffles or french toast for breakfast.

Unfortunately, the combination of the kids being sick and my pregnancy has left me without energy in the morning so we have eaten cereal and oatmeal. This afternoon I was planning to make some Banana Bread with the brown banana's I bought yesterday for 10 cents a pound and the recipe I love uses buttermilk. I didn't have any in the fridge, but when making butter from cream, you also get buttermilk as a side product! At last I had figured out how to use up my mistake!

I put the whipping cream back into the Bosch and let it whip for another few minutes until there was a clear separation of the solids from the liquids. People have said you can hear a change in your motor at this point... I just waited till a lot of the solids where sticking to the wire whisks.


At that point I poured as much of the liquid off into a separate bowl as I could. Then gathered up the solids in my hand and squeezed them over the bowl, after all you don't want to waste your buttermilk! You could also use a fine colander for this step if you are incline to dirty another dish. Your buttermilk is now ready for use.


Now you will need to rinse and work your butter in cold water a few (3-5) times, until the water runs clear. I highly recommend using ice water for this step or your butter will get too soft to work with successfully.
At first I started doing this with a large wooden paddle, to work the water into the butter, but after trying that, I figured my hands worked much more efficiently.


To make my butter presentable I put saran wrap inside of a muffin tin before stuffing the butter into it. I then put it in the fridge to harden it for a few minutes before unwrapping and plating :) Ready to eat with the hot fresh Banana Bread. Now, wasn't that fun?

Sunday, March 14, 2010

Curried Coconut Chicken


Since moving to Washington, I've fallen in love with Indian foods. Thai too, but that is another post, and we really should concentrate on getting one post up before we commit to a repeat. I first tried to recreate Butter Chicken, since that was my absolute favorite dish at all the restaurants..... It didn't work out so well. But in conversations with friends, they suggested I try making a Coconut Curry dish. My husband and I have combined multiple recipes to create our favorite. Through many months of tailoring, we have the recipe that I will be cooking for a long time.

Curried Coconut Chicken

INGREDIENTS

1.5 pounds boneless skinless chicken breasts, cut into 1/2-inch chunks
1 teaspoon salt and pepper, or to taste
2 Tablespoons vegetable oil
2 Tablespoons curry paste
1 Tablespoon garam marsala
1/2 onion, thinly sliced
2 cloves garlic, crushed
1 (14 ounce) can coconut milk
1 (14.5 ounce) can stewed, diced tomatoes
1 (8 ounce) can tomato sauce
1 Tablespoon sugar
Optional - (but I prefer to add them all)
1 zucchini
1 potato
1 handful chopped carrots
1/2 cup raisins

DIRECTIONS

Season chicken pieces with salt and pepper, and let them sit for a little bit.
Heat oil and curry paste in a large skillet over medium-high heat for about five minutes. You really want to infuse the oil. Stir in onions and garlic, and cook 10 minutes until onions are translucent. If you need more oil in the pan, add it now. You do not want your onions to be swimming, but you do not want them to burn either. While you are waiting on those onions, prep the rest of your vegetables.
Drain your can of tomatoes, saving the liquid to add in at a later point. Cook the tomatoes for a few minutes. Then add the can of coconut milk. You can use Lite, or Regular here, both impart the same flavor. Once the milk has come to a boil, add chicken. Reduce heat to medium, and cook for 7 to 10 minutes.
Pour tomato sauce, prepared veggies, tomato liquid and sugar into the pan, and stir to combine. Adding all of the option ingredients makes a wonderful one pot meal and the flavors are wonderful. Turn down your heat to low, simmer, stirring occasionally until thick. I recommend atleast 1 hour to really let all the flavors meld.
In the last ten minutes add the Garam Marsala. Do not over cook once you put this spice blend in as the flavors will cook out.
Serve over Basmati rice with homemade Buttered Naan. I dare you to not have multiple helpings :)

LinkWithin

Related Posts with Thumbnails